Event Planner: Event Setup Screen
From FloristWiki
(Difference between revisions)
| Line 4: | Line 4: | ||
<tr> | <tr> | ||
<td> | <td> | ||
| - | [[Image: | + | [[Image:X3FallOnlyIcon.png]] |
</td> | </td> | ||
<td> | <td> | ||
| - | This feature is available in FTD Mercury X3 Fall | + | This feature is available beginning in FTD Mercury X3 Fall. |
</td> | </td> | ||
</tr> | </tr> | ||
Current revision
|
This feature is available beginning in FTD Mercury X3 Fall. |
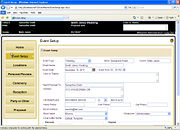
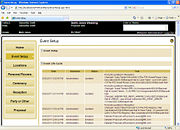
The Event Setup screen is displayed when you create a new event or when you view an existing event. When creating a new event, it enables you to provide details about the overall event (details about event locations and products for events are configured on subsequent screens). You can also access the event life cycle from this screen.
Event Setup
| Field/Setting | Description |
| Event Type | Select the type of event. |
| Bride | If this is a wedding, enter the name of the bride. |
| Groom | If this is a wedding, enter the name of the groom. |
| Event Name | Enter a unique name for the event. This is a required field, and will be used as the event name for searches. This a required field. |
| Event Date | Enter the date for the event. You can use the calendar button to select a date. |
| Event Time | Enter the time for the event. |
| Color or Theme | Enter information about the event's color or theme. |
| Send Proposal To | Enter the name of the person who should receive the proposal. This is a required field. |
| Address | Enter the street address of the person to whom you are sending the proposal. |
| City/State/Postal | Enter the city, state/province, and ZIP/postal code for the person to whom you are sending the proposal. |
| Home Phone | Enter the home phone number for the person to whom you are sending the proposal. |
| Work Phone | Enter the work phone number for the person to whom you are sending the proposal. |
| Cell Phone | Enter the cell phone number for the person to whom you are sending the proposal. |
| Email Address | Enter the email address for the person to whom you are sending the proposal. If you will be emailing the proposal, this field is required. |
| Store Name | If you are in a multistore environment, select the store with which this event is associated. |
| Employee | Select the name of the employee who is creating this event. |
| Cover Letter Name | Select the cover letter that will be used for this event. |
| Discount | In this area, select if you want a discount applied if the event is booked within a certain timeframe of receipt of the proposal. If there is a discount, enter the percentage for the discount and the number of days from receipt of the proposal that the discount will be honored. If you do not check the Discount box, a discount will not be included on the proposal. |
| Deposit | In this area, select if you are requiring a deposit for the event. If so, select whether you require a dollar amount or a percentage of the total event cost, and then enter the percentage or dollar amount as appropriate. Enter the number of days prior to the event when the remaining balance for the event is due. If you do not check the Deposit box, a required deposit will not be included on the proposal. |
Event Life Cycle
Whenever you perform any activity on an event, information is tracked via event life cycle. You can see the following information for each activity:
- Date
- Employee (based on the logged-in employee)
- Status (created, updated, emailed, printed, etc.)
- Text (what was actually done to the event)
Event Header
After you have entered in details about the new event, a header is displayed on all subsequent screens for the event. This header shows you the following information:
- Contact Name
- Bride (if for a wedding)
- Groom (if for a wedding)
- Event Name
- Event Status
- Total Event Cost
- Color or Theme


