Event Planner: Login Screen
From FloristWiki
(Difference between revisions)
| (3 intermediate revisions not shown.) | |||
| Line 1: | Line 1: | ||
| + | [[Image:EventPlanner_LoginScreen.jpg|thumb|Login Screen]] | ||
| + | <table> | ||
| + | <tr> | ||
| + | <td> | ||
| + | [[Image:X3FallOnlyIcon.png]] | ||
| + | </td> | ||
| + | <td> | ||
| + | This feature is available beginning in FTD Mercury X3 Fall. | ||
| + | </td> | ||
| + | </tr> | ||
| + | </table> | ||
| + | |||
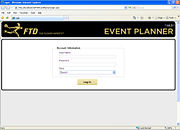
When you launch the Event Planner from either the FTD Mercury Main Menu or from your FTD Mercury desktop, the Login Screen is displayed. You must enter your FTD Mercury user name and password to proceed. If you are configured in a multistore environment, you must also select the store you are accessing Event Planner for from the Store list. | When you launch the Event Planner from either the FTD Mercury Main Menu or from your FTD Mercury desktop, the Login Screen is displayed. You must enter your FTD Mercury user name and password to proceed. If you are configured in a multistore environment, you must also select the store you are accessing Event Planner for from the Store list. | ||
Current revision
|
This feature is available beginning in FTD Mercury X3 Fall. |
When you launch the Event Planner from either the FTD Mercury Main Menu or from your FTD Mercury desktop, the Login Screen is displayed. You must enter your FTD Mercury user name and password to proceed. If you are configured in a multistore environment, you must also select the store you are accessing Event Planner for from the Store list.
When you click Log In, the Event Planner Dashboard is automatically displayed.

