Setting up email
From FloristWiki
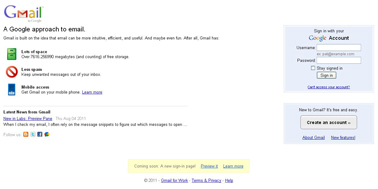
Florists Online supports setting up your e-mail with Google. Google allows up to 10 accounts to be set up for free and the mailbox is large. Also, there are excellent spam and junk mail filters with Google that allows you to prevent these unwanted e-mails.
To set up e-mail with Google:
- Go to: http://www.google.com/apps/intl/en/group/index.html
- On the right, click Get Started
- Input the domain name for your shop and click Get Started
- Fill out the personal information. When it prompts you for an e-mail address, you can not use the one you are about to create.
- Create the Administrator account – this is going to be the PRIMARY account.
You now have set-up an account with Google. You next have to verify your domain. To do so:
- Click on Dashboard.
- At the top, click on Activate Google Apps
- Select Alternate Methods
- From the options, click on Add a meta tag to your site’s home page.
- Copy the meta information and either e-mail to Florists Online or add in Web Portal under Google Site Verification.
- Click Verify
This verification process may take a few hours to complete. You may want to logout and continue further later.
If you logout, return to http://www.google.com/apps/intl/en/group/index.html to continue.
- At the top, click Sign In
- Input your domain name and select Domain Management
- Log in using the administrator account that you set up above.
After logging back in (using the domain and the PRIMARY account you created above):
- Click on Activate E-mail.
- Provide the MX records listed to Florists Online. This should be ASPMX.L.GOOGLE.COM
If you receive something different for the MX records:
- Click Set-up at the top
- Click Set-up your apps on the left
- Click Gmail on the left
- Make sure "Google Servers" is selected, and click next
- You should now see the correct MX record(s): ASPMX.L.GOOGLE.COM
- Once provided (and confirmed with Florists Online that this has been input), click I have completed these steps.
- This may take up to 48 hours to complete. You can proceed in the meantime.
To proceed in creating e-mail accounts:
- Click E-mail again.
- Create a Catch All e-mail address. This is set up so that if the customer inputs the e-mail address incorrectly (ifno instead of info), it will still be received by you. It is advised that this is the PRIMARY that was set up above.
- Click Save Changes.
- Click Instructions on how to activate email
- Click Create user accounts
- Input the first/last name that you want to have displayed.
- Input the e-mail address that you want to create.
- Click Set Password. This is the password that this user will use to check their e-mail.
- Click Create New User. This will save the changes you made above and allow you to set up another account.
- Continue with the above steps until all e-mail addresses are created.
To login and check your e-mail, go to gmail.com. For your username you will need to use your COMPLETE e-mail address. The password is the one that was set up in the steps above.
It will may up to 48 hours for the MX records to sync and you may see delays in sending or receiving e-mails during this time period.
When you log into your e-mail, you will have welcome e-mails from Google. These will include instructions on how to access your account on your mobile phone.
Releated Videos
| Video Name | Running Time | Streaming Flash Video |
| Setting Up Email | 9:30 | Link |
Can't find an answer to your question? Fill out our training request or contact us at either 800-576-6721 or floristsonline@ftdi.com.

