Modifying default enclosure cards
From FloristWiki
(Difference between revisions)
| (One intermediate revision not shown.) | |||
| Line 1: | Line 1: | ||
| + | [[Image:DefaultEnclosureCard.PNG|thumb|Modify default enclosure card]] | ||
| + | [[Image:EnclosureCardPrintSettings.PNG|thumb|Default enclosure card settings]] | ||
| + | |||
<span style="color:#514d4d">Mercury cloud administrators and managers can modify the default settings for enclosure cards, including the banner or logo that is printed, and the store information that is included.</span> | <span style="color:#514d4d">Mercury cloud administrators and managers can modify the default settings for enclosure cards, including the banner or logo that is printed, and the store information that is included.</span> | ||
<br><br> | <br><br> | ||
Current revision
Mercury cloud administrators and managers can modify the default settings for enclosure cards, including the banner or logo that is printed, and the store information that is included.
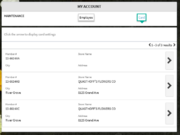
- In the left sidebar, click My Account.
- In the “Maintenance” section, click Card.
- Navigate to the store whose enclosure card you’d like to configure and click the arrow to the right of the store details.
- Note: You can modify enclosure cards for any stores that have been added to the account.
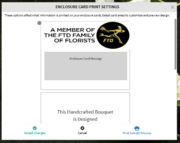
- To print a logo or banner in your enclosure card, click in the “Logo or Banner” section.
- Click Print Banner to print a banner in your enclosure card.
- Click Print Logo to print a logo in your enclosure card.
- If you don’t have a saved image, click Browse to select an image.
- Note: Logos and banners can’t exceed 10 MB and must be .jpg, .gif, or .png files.
- Set the orientation of the logo or banner within the enclosure card using the orientation buttons above the enclosure card text. Logos can be on the top left, top right, bottom left, or bottom right of the enclosure card while banners can be on the top or bottom of the enclosure card.
- To modify the shop message text, click in the “Shop Message” section.
- Modify the shop message text.
- In addition to changing the message text, you can center the text, erase it, modify the background color and font style, and check the text’s spelling.
- To modify the store information, hover over the “Store Information” section.
- Modify the store information, including the store name, address, and phone number.
- Click PRINT STORE INFO to print the store information.
- To see a sample of the enclosure card, click Print Sample Preview.
- Click Accept Changes to modify the default enclosure card for the store.
- Tip: If you’re not ready to modify the default enclosure card, click Cancel to return to the Mercury Cloud login page.


